As I mentioned in the past, I chose West System 207 hardener for my project. I like this material because it has a low amine content (less smell, less blush), it is clear, it has some built-in UV protection, and it has a slower cure time. Unfortunately, it also requires a higher ambient temperature in order to cure than some other hardeners. With colder weather here, this has limited my work to sanding, filling, etc. or mixing epoxy on those few days where the temperature reaches up into the 70's.
So on the colder days, I've been working on small projects that don't involve epoxy. Previously, I mentioned that I decided to leave natural the cedar stripped curved panels that join the deck with the cockpit side panels. This decision meant that I had to remove all of the staples that I put in there to hold the strips together. This was a pretty tough job because I had previously epoxied over these strips.
Well with a bunch of sanding, and prying, and digging, I finally got them all out. There are of course some divots that need to be filled in, but that shouldn't be too big of a deal.
Two other small jobs that I got around to were to line the inside of the keel box with carbon fiber, and to install and trim the keel crane well (described earlier). I did this on a nice Fall day where the temperature reached up into the high 70's
There won't be too many more warm days this year, so rather than put off work for the Fall, I went ahead and bought a heater for the garage (I mean workshop). The unit that I bought was just a simple radiant unit I found at Home Depot. It would cost too much to run this unit in the Winter, but it should add a few degrees to the garage (err. . . workshop) temperature, so that I can extend the epoxy season. I'd like to glass all of the deck/cabin top in the next couple of weeks. My plan is to flip this thing over during Thanksgiving weekend when I'll have a bunch of people around to help.
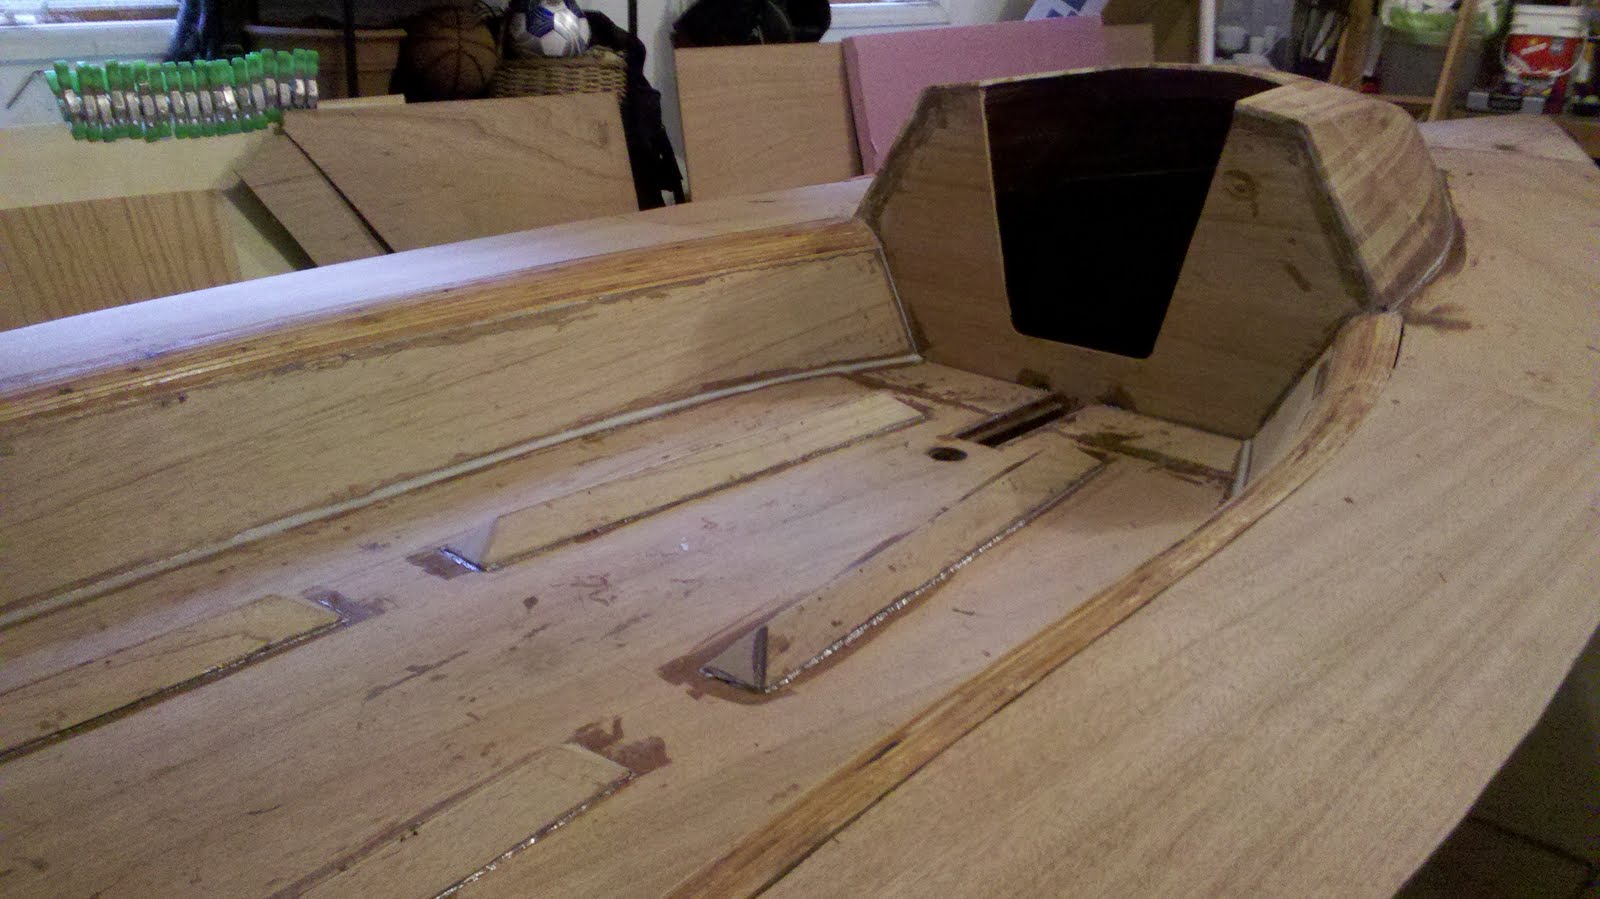
I've been working toward glueing down the last remaining portions of the deck. The only parts that weren't permanently attached were the deck panels above cockpit sides.


 I hadn't used a router for something this big in quite a while so I forgot a few basics, like; make sure that the screw holding the bearing on the router bit is tight. The picture to the right shows some filler that I had to add because of this oversight. Once the filler dries, I'll clean it up and re-route that section of the gunwale.
The last little bit of work that I accomplished was to fabricate a piece of mahogany for the very front of the cabin. The picture below shows the result.
We've had a small debate about the curves between the aft deck and the cockpit sides. As described earlier, I made these out of 3/8" x 3/8" cedar strips formed around curves in the frames and a couple of curved support blocks. These strips were glued together and held in place with staples while the epoxy set. I really only used cedar because it was easy to work with and is rot resistant. I had intended to glass and paint over this whole area.
To make a long story short, my kids think that I should not paint over the curved sections and instead should just varnish this area. They think that it would be a nice continuation of the (natural cedar) cabin top. I agree with them, but to go with this look I have to remove a whole lot of staples (probably a couple hundred), most of which are under a layer of epoxy. I've decided to give in on this - it will probably take several hours to get them all out, but it will probably be worth it. Of course I need to do this soon because I'm not too far away from glassing the entire deck.
Work on the boat over the Labor Day weekend consisted of a bunch of small jobs that really don't look like much to friends and family. The most visible mini-project was reinforcing the bow prod receiver tube with carbon fiber. To do this, I used small bits of 1/4" plywood to "fill in the gaps" between the hull and to protruding tube, and then laid 12 oz. carbon fiber clot over the whole thing.
The next task was to simply trim off the excess when the epoxy set.
The other big(ger) task over the weekend was to reinforce the seams between the cabin and the deck, and between the cockpit floor and the sides. In both cases, I used biax tape which I wetted out ahead of time. All of these seams are "outside" curves (even though they are inside the boat) with gravity as the enemy. An extra set of hands would have been nice, since it took quite a bit of time to get the tape to stick. In any case, the reinforcements looked really smooth after they were done. Once the tape was in place, I then filled in the gap between the cabin and the deck with thickened epoxy.
Bow Prod Extension and Retraction
Thinking a bit ahead, I'm planning on having a very simple bow prod extension mechanism, with a pulley on frame 18 and a line running straight back through the cabin bulkhead to a jam cleat. I'm planning on having the spin tack line run right through the center of the prod and out the tip (which I still need to fabricate). The tack line would also double-duty as the pole retraction cord. The tack line will also run though the cabin bulkhead and will cleat right next to the prod extension line. Of course all of this may change, but that's the plan for now.
Over the weekend I also constructed and glued down the foot bensons. Of course, the primary purpose of the bensons are to keep the crew from sliding to the other side in a strong wind, however it turns out that they are perfectly placed to get rid of a little bit of flex in the cockpit floor. I'd like to think that I planned it that way, but . . .
The picture to the left and below show the results so far. Like most everything else in the boat, these were made out of 1/4" hydrotek. I cut 3" strips for the outside pieces and 2 3/4" strips for the inside and glued them at a 90 degree angle.
The only tricky parts were cutting the end angles and the end caps. I cut the angles and the end pieces before committing anything to epoxy. In retrospect, it would have been easier to just glue the side pieces together and then cut the end angles on the table saw after they were done. In any case, the bensons came out very nice. Finally, I rounded the edges and set them in place with thickened epoxy. I will filet the edges of the bensons prior to glassing the cockpit.
The bow prod looks good and it was time to create the receiver sleeve for the prod. As before, I created the receiver tube out of carbon fiber sleeves from Solar Composites. This time however I made to significant changes in the fabrication, 1) I did not vacuum bag the item, and 2) I put the Kevlar composite sleeve on the inside rather than the outside. Other than the look, the primary benefit of using carbon/kevlar is that the kevlar is much more resistant to long term wear and abrasion than carbon fiber.
Of course we want the receiver tube to have a slightly larger inside diameter than the outside diameter of the prod. So I used the prod as the mold for the receiver, and wrapped 6 mil plastic around it several times in order to insure that the receiver tube would have the necessary clearance from the prod.
As I mentioned above, I did not vacuum bag this part. Instead I just hung the prod from the ceiling of the garage, put on the four layers of sleeving material in the same way that I created the prod previously, painting each layer with epoxy. The layers were taped to the mold (at the top) and then I simply stretched each layer by pulling downward. Finally, I wrapped the whole thing in release cloth. The picture on the right shows the sleeve hanging with the release cloth still attached.
Once the epoxy hardened, I removed the release cloth and pulled the finished receiver tube off of the prod and then cut it to length on the table saw.
The picture to the left shows the fitting of the receiver tube through the starboard side of the bow. The picture below show the tube tacked in with a bit of thickened epoxy.
The next step is to reinforce this area with some 12 oz carbon fiber cloth. I need to add some reinforcing to frame 18 as well to hold the back end of the receiver tube more securely.
So I got it in my head that I could fabricate my own bow prod out of carbon fiber sleeves. As described below, I previously built a carbon fiber tube to use as the well for a crane to lift up the keel. This was quite a bit larger undertaking. The "mold" for the prod was a section of 2" PVC pipe from Home Depot. This pipe has an outside dimension of 2 3/8". I sprayed the length of tube with plain old Lemon Pledge furniture polishing wax. and then wrapped the pipe with polyethylene sheet prior to pulling on the carbon fiber sleeve. I didn't have the courage to try this without the plastic sheet, but I think that it would be possible to just mold the tube over the PVC pipe directly. Lemon Pledge actually works pretty well as a release agent. Some time in the future I might experiment a bit with this.
Pulling on the first layer of CF sleeve is pretty easy. This stuff works just like the finger traps that you buy in Chinatown however and will bind if you pull too hard on it - you almost have to push it on. I then just painted the entire length of the sleeve with epoxy.
For subsequent layers, it is best if you roll up the ends axially (like you would a sock) and then push them together to form a very wide pipe. It is pretty easy to slide this wider "pipe" over the previous layers, and then expand it outward from the middle. For each layer, I then painted on the epoxy.
I used three layers of heavy 3" carbon fiber sleeves and (more for aesthetics than anything else) an outside layer of a Kevlar Carbon fiber weave. I then vacuum bagged the whole thing.
I hadn't done a vacuum bag on something this large. It came out pretty well. The surface under the top of the bag is absolutely beautiful. The bottom collected some excess epoxy which I had to remove with a Stanley Sureform and some sand paper. If I had it to do over again, I think that I definitely would have used release cloth between the bag and the tube.
In any case the tube came out pretty well. The whole thing weighs less than four pounds and it is incredibly rigid. The tube is very round except for the last few inches near the ends. I'll just trim both ends. This will leave the tube a bit short, but I'm going to put a tapered tip on the outside end anyway, so I'll just make this tip a couple inches longer than I was going to.
If I had it to do over again I would not have used the Kevlar composite on the outside layer. Carbon fiber sands very easily whereas Kevlar does not. Also, Kevlar is less UV resistant. I don't view that as a big deal however since the pole will be retracted most of the time. Finally, in retrospect, I think that I could have gotten a very nice tube without the bagging by bunching the four sleeves together at one end and then tying a string to them, hanging the whole thing from the ceiling, then tying a weight to the other end, and then wrapping the whole thing in release fabric. I say this because the tube looked really nice before I even put it in the bag.
Next up is to fabricate the receiver tube. Of course I'm going to use the prod as the mold for the receiver. I don't think that I'll vacuum bag the receiver.
Finally, I don't have an exact cost on the tube since I bought more sleeve material than I needed. But roughly the prod and receiver are going to end up costing me about $300. This would have been a bit less if I had just used carbon fiber.