The weather is much warmer these days, so I'm back in the garage working on the boat. It's still a bit cool for the epoxy, so I warm up the garage to 70 deg. or so with a propane heater. With outside temps around 60 deg, I don't need to spend a fortune on propane now.
The biggest project this weekend was fairing the boat bottom and the keel foil. The picture to the left and the one below show fairing compound on the hull and foil. The hull itself was pretty fair and the areas that needed filler were the locations where the hull sat on the cradle. In any case, I think that the bottom is now ready for a final sanding and then it's time for fiberglass.
The foil looks pretty good also. The keel bulb mold is ready now, so I'm planning on pouring lead in the next few days. Once that's done, I can bolt the bulb onto the foil, and fair the entire keel.
I started construction of the keel bulb mold. For those who are not familiar with the keel design for the i550, basically it consists of a straight shaft (see below) to which you attach a lead weight at the bottom to help keep the boat upright. There are some class restrictions on the minimum diameter of the bulb cross section, but other than that the bulb can be any shape that you want it to be. One of the earliest builders of the i550 had a marine engineer design a bulb with a low center of gravity and hopefully a very hydrodynamic shape. That design was then shared with the i550 build community. More recently, Chad from Knot Racing modified that design to include a flat "beaver tail" trailing edge, and went even further in creating a bulb plug to be shared with anyone building an i550. I was fortunate enough to be the second recipient of the bulb plug, and will send it on to the next builder on the list when I'm done.

To make the bottom half of the mold I created a wooden box for the bottom part, and then poured in a sand concrete mixture. I then wrapped the bulb plug in cellophane and then pushed the plug down into the wet concrete. The bag of play sand shown was used as a weight to keep the plug from floating on top of the concrete. Once the concrete dried, I removed the plug and took off the cellophane. I then put the bulb back in the hardened mold and put a sheet of 4mill plastic over it. The top mold/frame was made with 2x4's and was fastened to the bottom mold box with 1/4 plywood scraps and some nails. Before pouring concrete for the top half of the mold, I taped some plastic cups to the plug to create holes for pouring the molten lead into the mold cavity. I then poured the concrete and let it dry. A small note: I did reinforce the concrete a bit using cut up and bent wire coat hangers. I really only need the molds to make it through one pour so I thought that this light re-bar approach would be good enough to keep things together until after I'm done. We'll see.
Once the molds are done, I'm going to have to create a cast "insert" which will basically form the hollow in the lead bulb where the keel shaft will go. I'm planning on making a mold for the insert using the existing shaft to form the mold.
I decided to build my own spreaders for the mast since I had a partial role of 19.9 oz, 3 inch carbon fiber sleeve (from solarcomposites.com) left over from building my bow-prod and bow prod receiver, and some uni-directional CF cloth left over from the keel. I really didn't have any idea how strong these should be, but I got some good advice from some of the people on the i550class.com forum.
To start, I wanted a nice airfoil design for the spreaders. The idea of course is to reduce wind resistance, but this shape also has a nice appearance. In order to get this shape I bought some tapered foam inserts from flyingfoam.com. These were NACA 0015 shaped. The standard quick order foils have a maximum length of 36", so rather than ordering a custom shape, I just ordered four 36 inch foils and some shorter fixed chord-length inserts to extend the length of the lower spreaders.
For the lower spreaders, I wrapped the core with 5.7 oz fiberglass cloth, then covered that with a carbon fiber sleeve, then covered the top and bottom surface with 12 oz unidirectional cloth, and then covered all of that with another 19.9 oz sleeve. I painted epoxy on the core initially and then on each of the layers that I added. For the upper spreaders, I did the same thing, but I wrapped the core twice with fiberglass and only used one layer of Carbon Fiber sleeve.
One of the nice things about the foam cores that you buy from Flying Foam is that they are shipped in the foam that the cores were cut out of. These "female" shapes are very nice for using as a press after all of the layers of composites are put on and painted. This avoids having to vacuum bag these things in order to get a very nice finished shape. So after everything was nice and gooey, I wrapped each of the spreaders in release cloth, then a light plastic sheet and then put the whole thing back inside of the female shapes. I then put a board on top of the pile and put weights on top of that. The picture above shows the finished spreaders. I don't have the exact length that I want them to be yet so they will be cut to size later. The spreaders actually look quite a bit nicer than in the photo. The mat look is due to the texture from the release cloth. I think that I'll varnish these in order to get the nice carbon fiber look.
I was originally planning on mounting the spreaders to the mast with a bracket with a pivot point. Based on some feedback that I got from Chad on the forum, I think that I might mount them in the shape of a hard V instead of having the pivot points.
As a final note, these spreaders are extremely stiff. I can barely get a deflection on the lower spreaders when I lean on them. The lower spreaders ended up weighing 1lb 4oz each and the uppers weigh 12 oz each.
It may not look like it from this angle but the keel now has nearly a perfect NACA 0012 shape. I just need to fill in a few divots and it will be ready to be wrapped in 11oz carbon fiber cloth. I figure that with a mahogany core, the unidirectional CF on the sides and the outer wrapping with biax cloth, this should be a very stiff keel.
After wrapping with cloth, I'm going to get started on shaping the plug for the keel bulb.
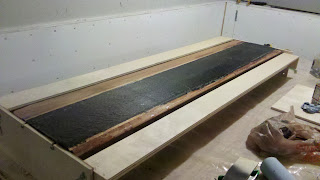
It's winter now in Cleveland and it costs too much to heat the garage, so I've moved my work into the basement. Needless to say, I can only work on projects that I can actually get back up the basement stairs. The project for this week is to finish the keel.
It's Thanksgiving weekend and I have sons at home to help flip the boat. I was thinking about priming the deck before the flip, but didn't get that far before this weekend. However I did finish glassing everything on the topside of the boat and I gave it a once-over with the Sureform and sander.
I have to again thank the previous builders who have provided tips on not only building the boat, but also advice on how to make the project easier. The single best piece of labor saving advice was to put castors on the boat building cradle. It was very easy to roll the boat out of the garage, up the driveway and to put it right next to the front yard. From there we picked it up and placed it on plastic sheeting on the grass
Once the boat was on the grass, we rolled the cradle back into the garage for modifications. The picture on the right shows the cross braces that we aded to support the boat in the upside-down position. These cross members line up with frames 53.5 and 169. I shaped the support for frame 53.5 so that it fit the contour of the deck and the front of the cabin.
The next step was to roll the boat up on its left gunwale. One of my sons had the good idea to tilt the cradle over on its side as well so that it lined up with where we wanted it to meet the deck of the boat. This was a great idea because we just rolled the whole thing (both the boat and the cradle) back onto the castors. Very little lifting required and no injuries.
A little bit of adjusting on the cradle came next so that the supports lined up with the frames and we were done with the flip.
On this Thanksgiving, I give thanks for having very strong and smart boys. The three of us did all of the lifting, and with a bit of help from my wife and a neighbor that was passing by were able to flip the boat.

The photo to the left shows my two helpers.
We moved the boat back into the garage. I couldn't be happier with the condition of the hull. I really think that using angled scarf joints between the panels (using a West System scarfer) gave the boat a naturally fair surface. I highly recommend this approach to prospective boat builders.

Here are a couple of pictures of the deck with the release cloth removed. There are a few bubbles that need to be removed and a few places where the release cloth didn't make contact with the epoxy that need to be filled, but over all the surface looks really good. A bit of prep work and the deck will be ready for priming.


